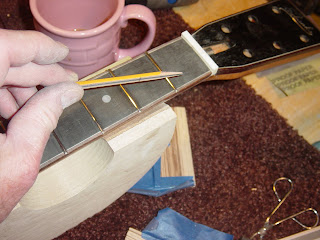
Then I sanded the fretboard one more time with 600 grit paper to remove any finish that accidentally got on top, as well as any scratches through all the handling.
OK, on to making the nut. Both the nut and the saddle are made of bovine hip bone that's been bleached white. This provides superior sound transference than the plastic used by the large manufacturers, but there's a drawback: when bone is cut or sanded, it smells just like when the dentist is drilling your teeth.
Good memories.
The nut blank must first be thicknessed to fit in the nut slot, first on the belt sander ("Nog thir, ith dothn't urth at ahl") to hog off a lot of material quickly, then on a piece of sandpaper laid on a flat surface (tablesaw) to bring it to final dimension. I want it loose enough to fit in fairly easily, but not so loose that it will slide out on its own when the guitar is tipped.
Mission accomplished.
 Then I cut and sand it flush to each side of the neck. I use a pencil that has been sanded flat on one side to mark the top of the first fret as well as the curve of the fretboard onto the nut, then sand to just above this line.

I place it in a nut-making vice, measure 1/8" from each edge, and mark a line. These are the locations of the first and sixth strings.

I want the six strings to be equally spaced between each other, but it's not as simple as just dividing the distance between the first and sixth strings by four, because the strings are different thicknesses, so the gap between the wound strings would be closer than between the unwound strings. There's a way to figure out the correct distances mathematically, but I'd rather use a string-spacing rule that I bought for like $10.
I use it to mark the locations of the other four strings:

I rough cut the slots using a fret saw, angling down toward the back of the nut so that the high point of the resulting nut slot is at the fretboard side. (The special vice allows for this; normal vices would get in the way.)
 This will be the break point of the string, and the zero location of the fret scale. If it breaks back toward the headstock the scale length for that string will be lengthened, all the fret locations will be off, and it will be impossible to play in tune.
There. All the slots have been cut and will hold a string. Later on I'll file the nut slots with special files to accommodate the different thicknesses of the strings, but at the same time I'll file them at the correct depth to give me good action at the first fret.

If you look at the far left at the sixth string slot you can see that some of the bone blew out when sawing the slot. That's all right, because the next thing I do is file that back edge off so that the nut slants toward the headstock, and when I do that chip out will go away.
Can't hold strings without tuning machines, so I install those next.
Hey, it's really looking like a guitar now, huh?

No strings until the saddle is made and installed and holes for the string pegs have been drilled in the bridge, so that's next.


Almost there and it looks so nice!
ReplyDeletePictures don't do it justice.
ReplyDelete